The embed widget allows you to view and interact with other apps and content in your processes, without leaving your workflow runs.
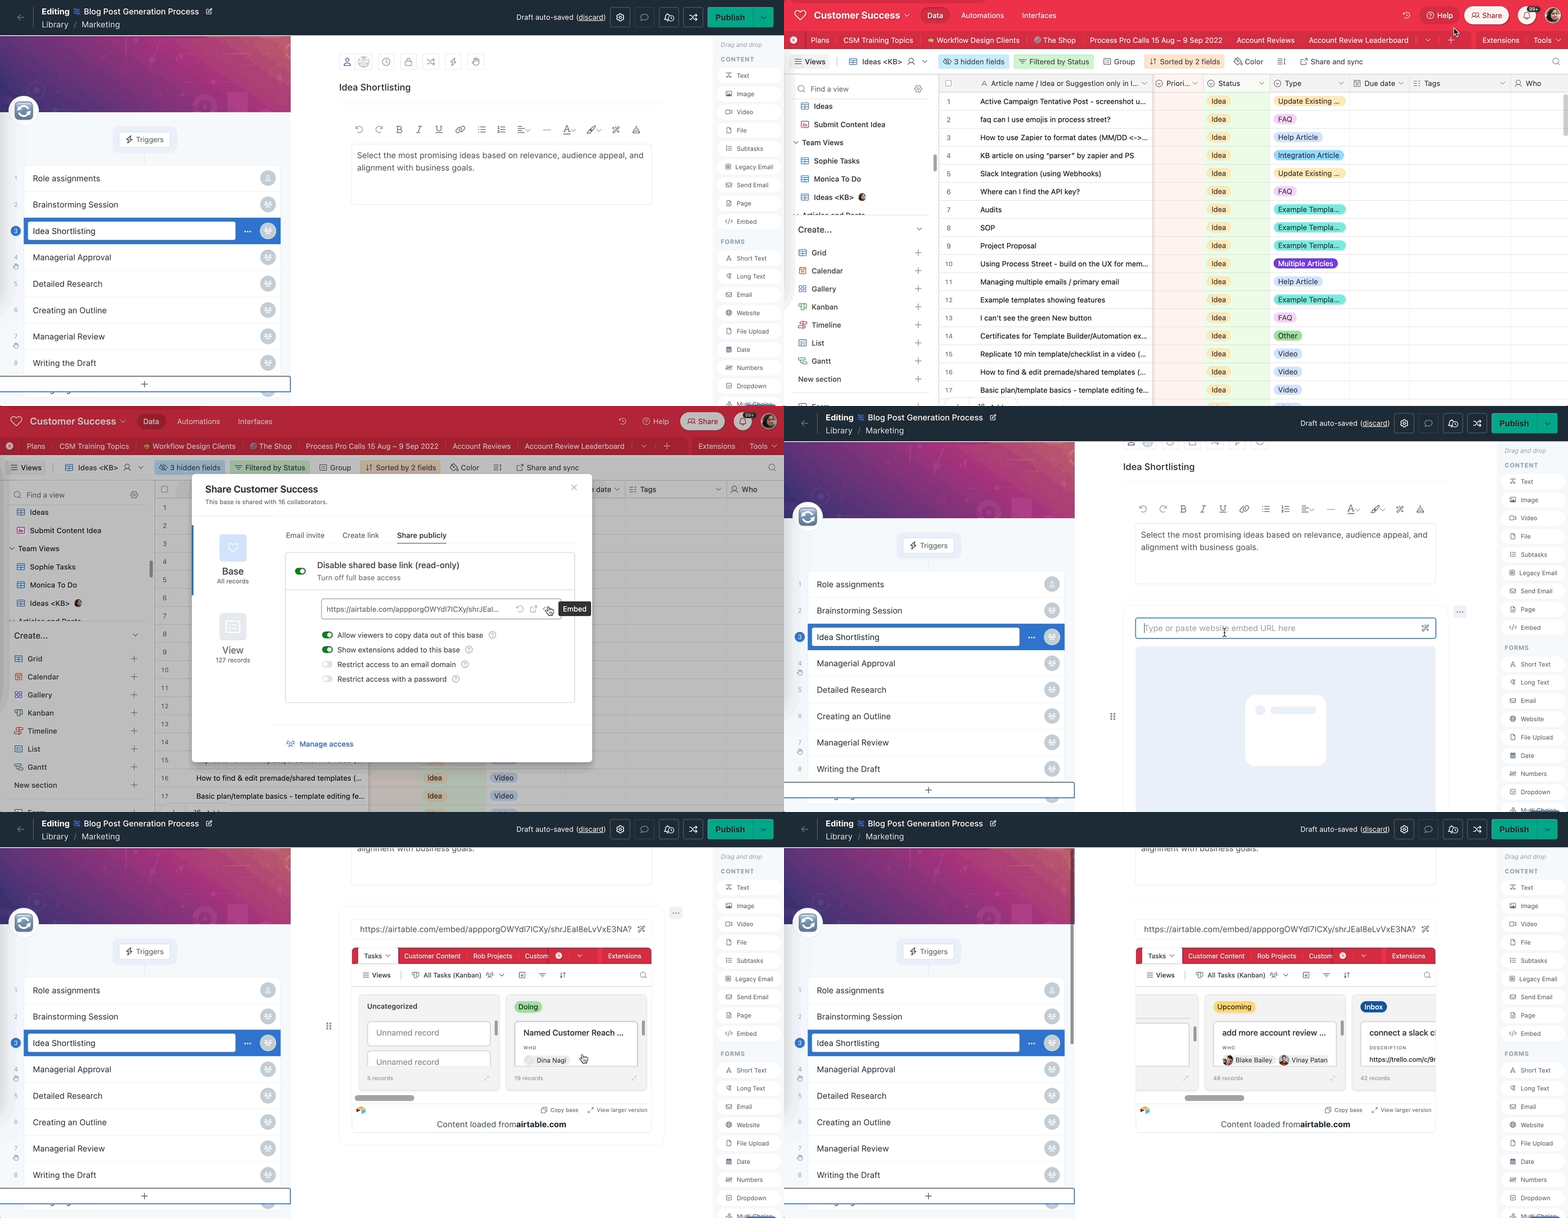
If you’d like to add a Google sheet, another Process Street workflow run, an interactive map, an Airtable view, or stream multimedia in your workflow runs, the embed widget lets you do just that.
Users: To add or edit the embed widget in your workflows, you must be an Administrator or a Member who has been given ‘edit’ access by your Administrator.
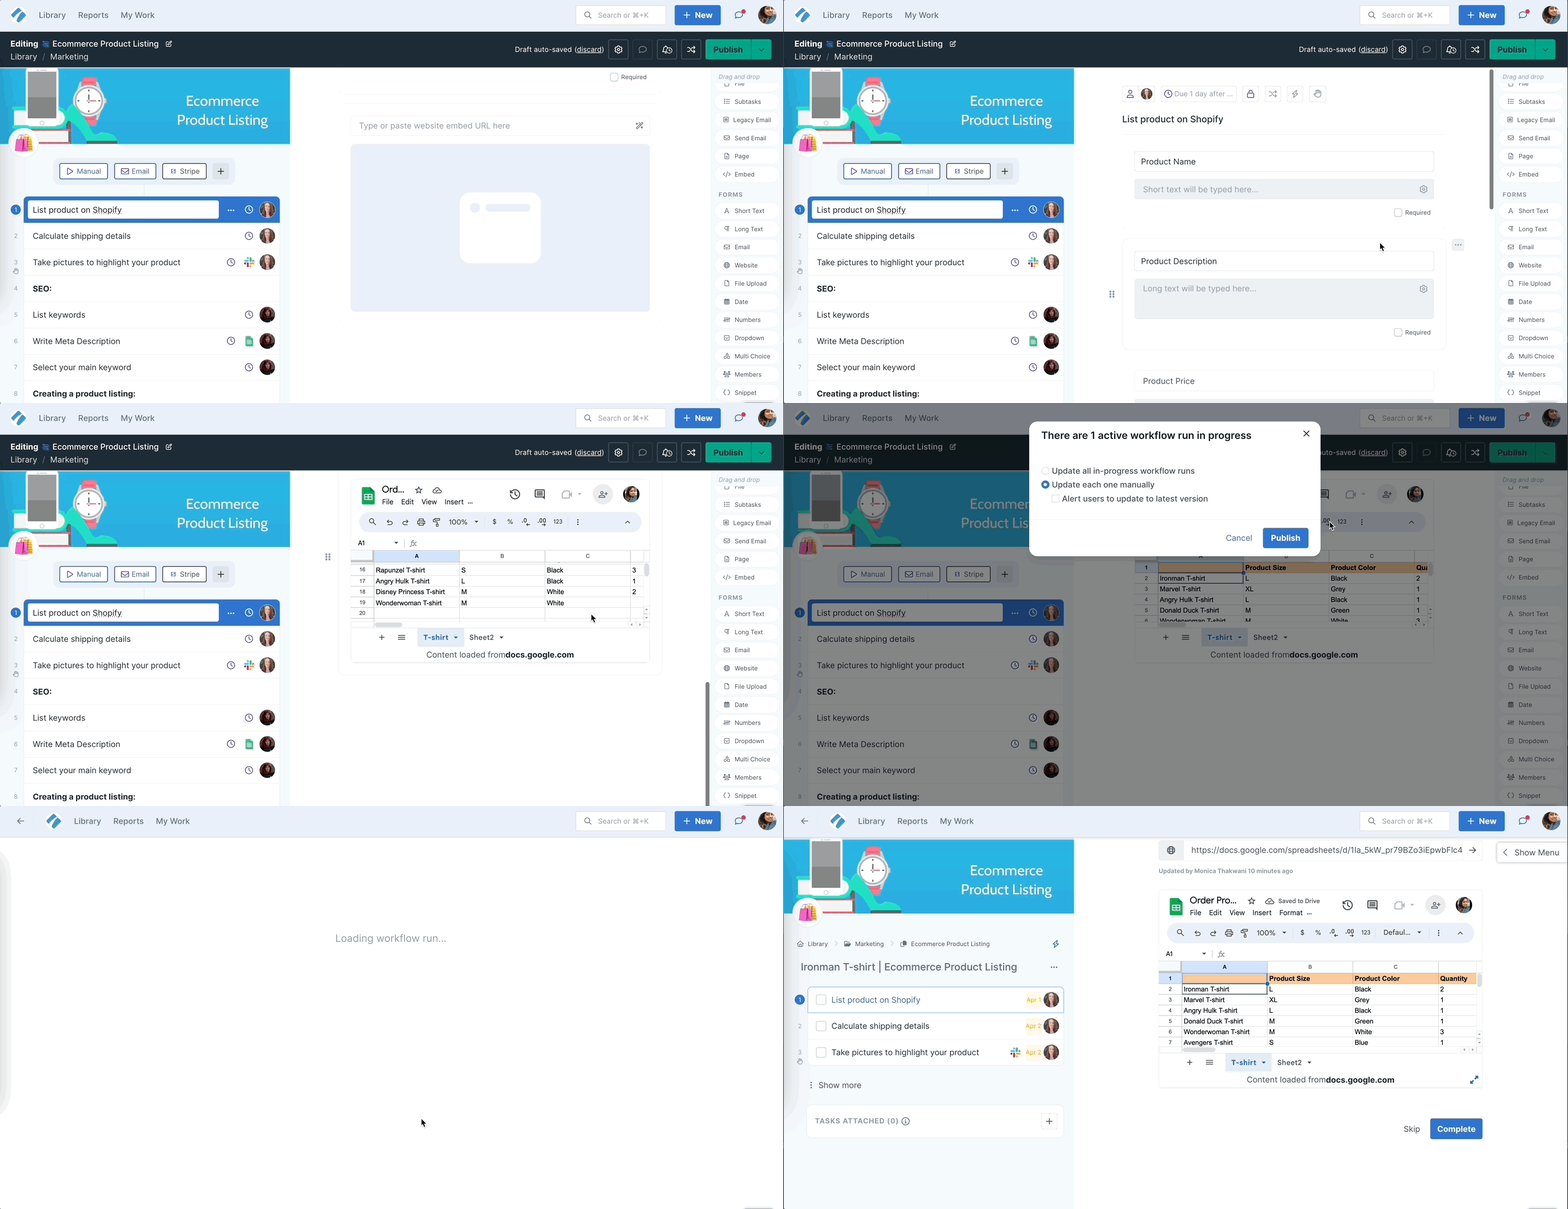
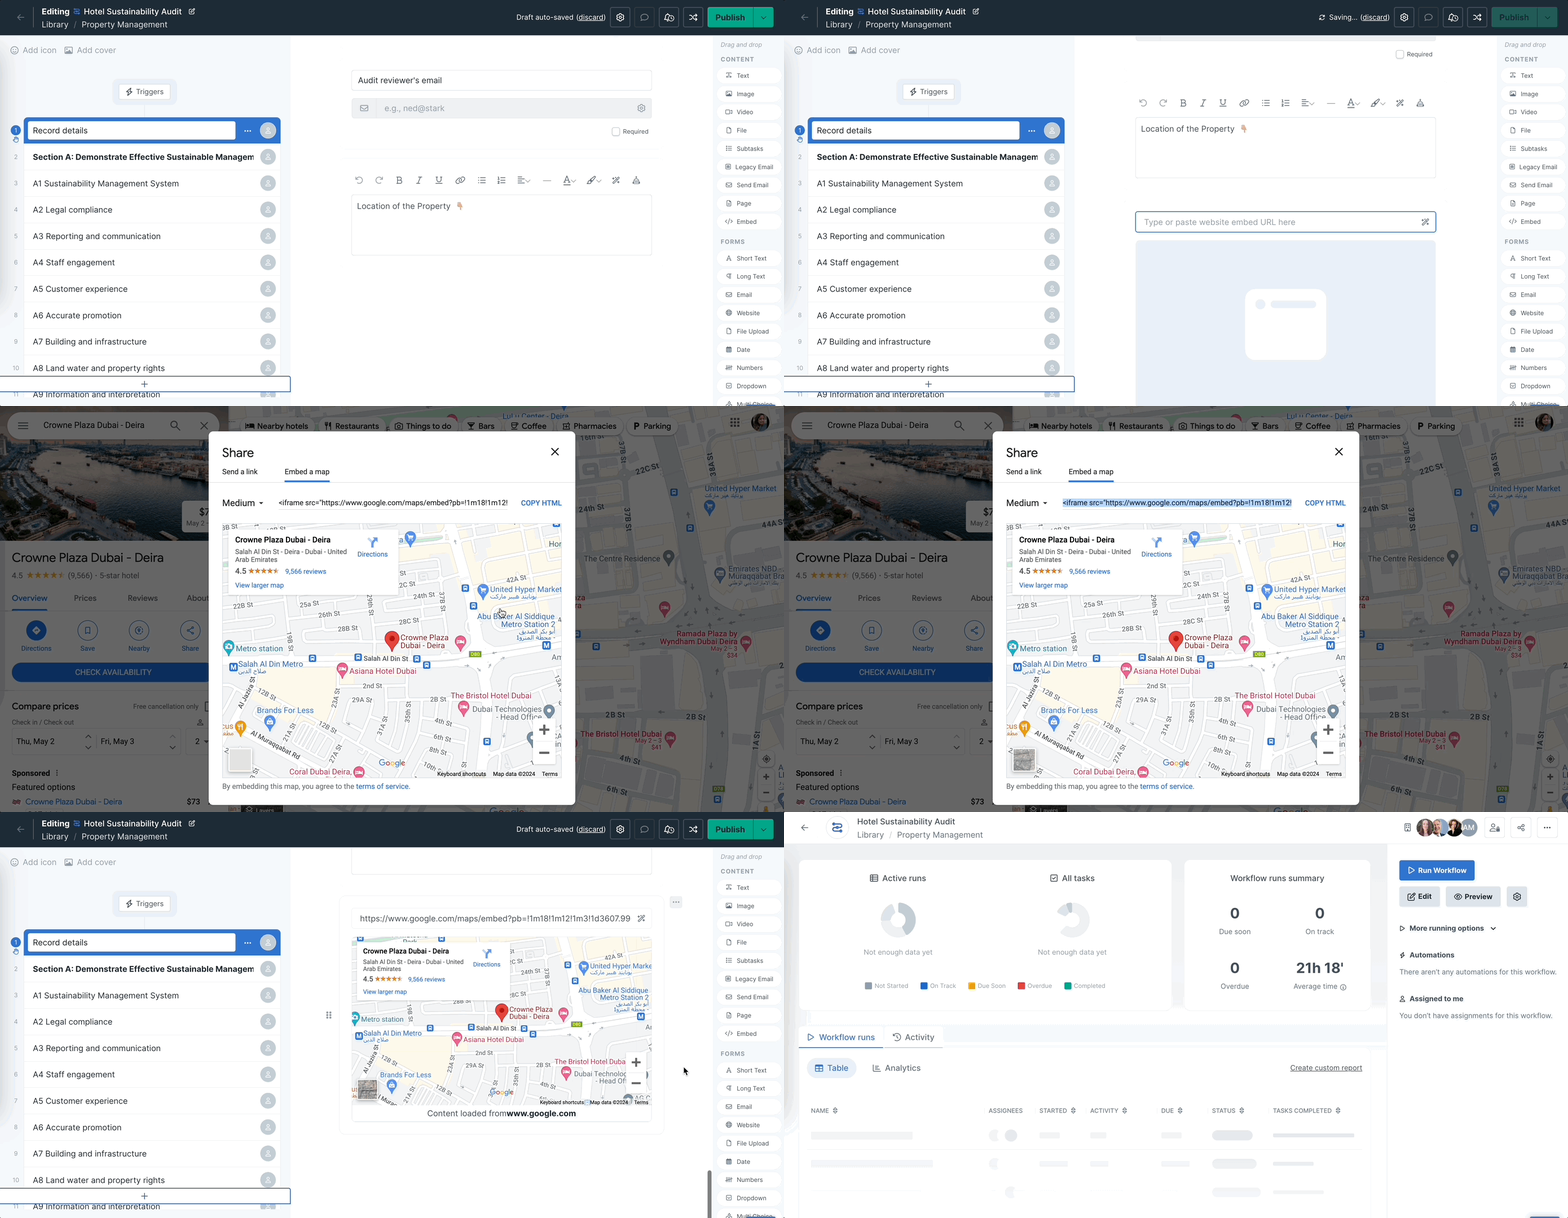
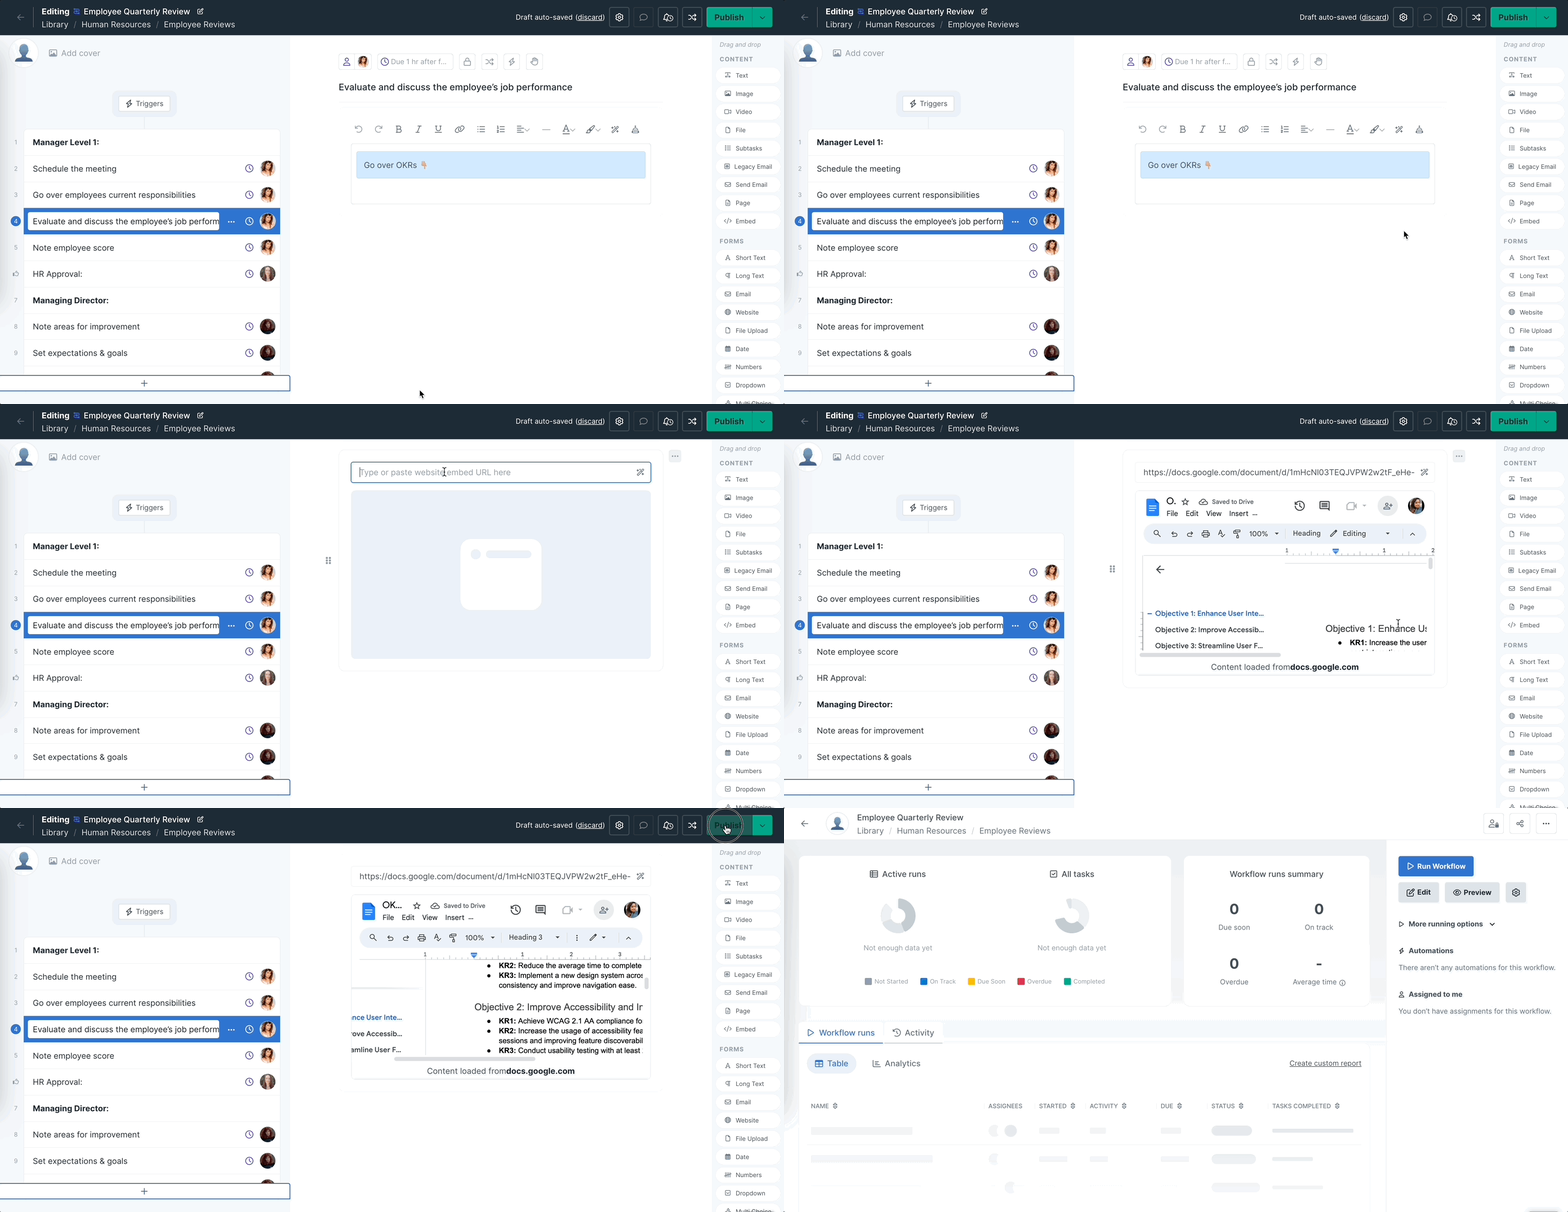
To have embedded, interactive content or apps appear in your workflow runs, you first need to add the embed widget to a task in your workflow.
Start from your library and look for the workflow where you want to add embedded content, then click the Edit button next to its name.
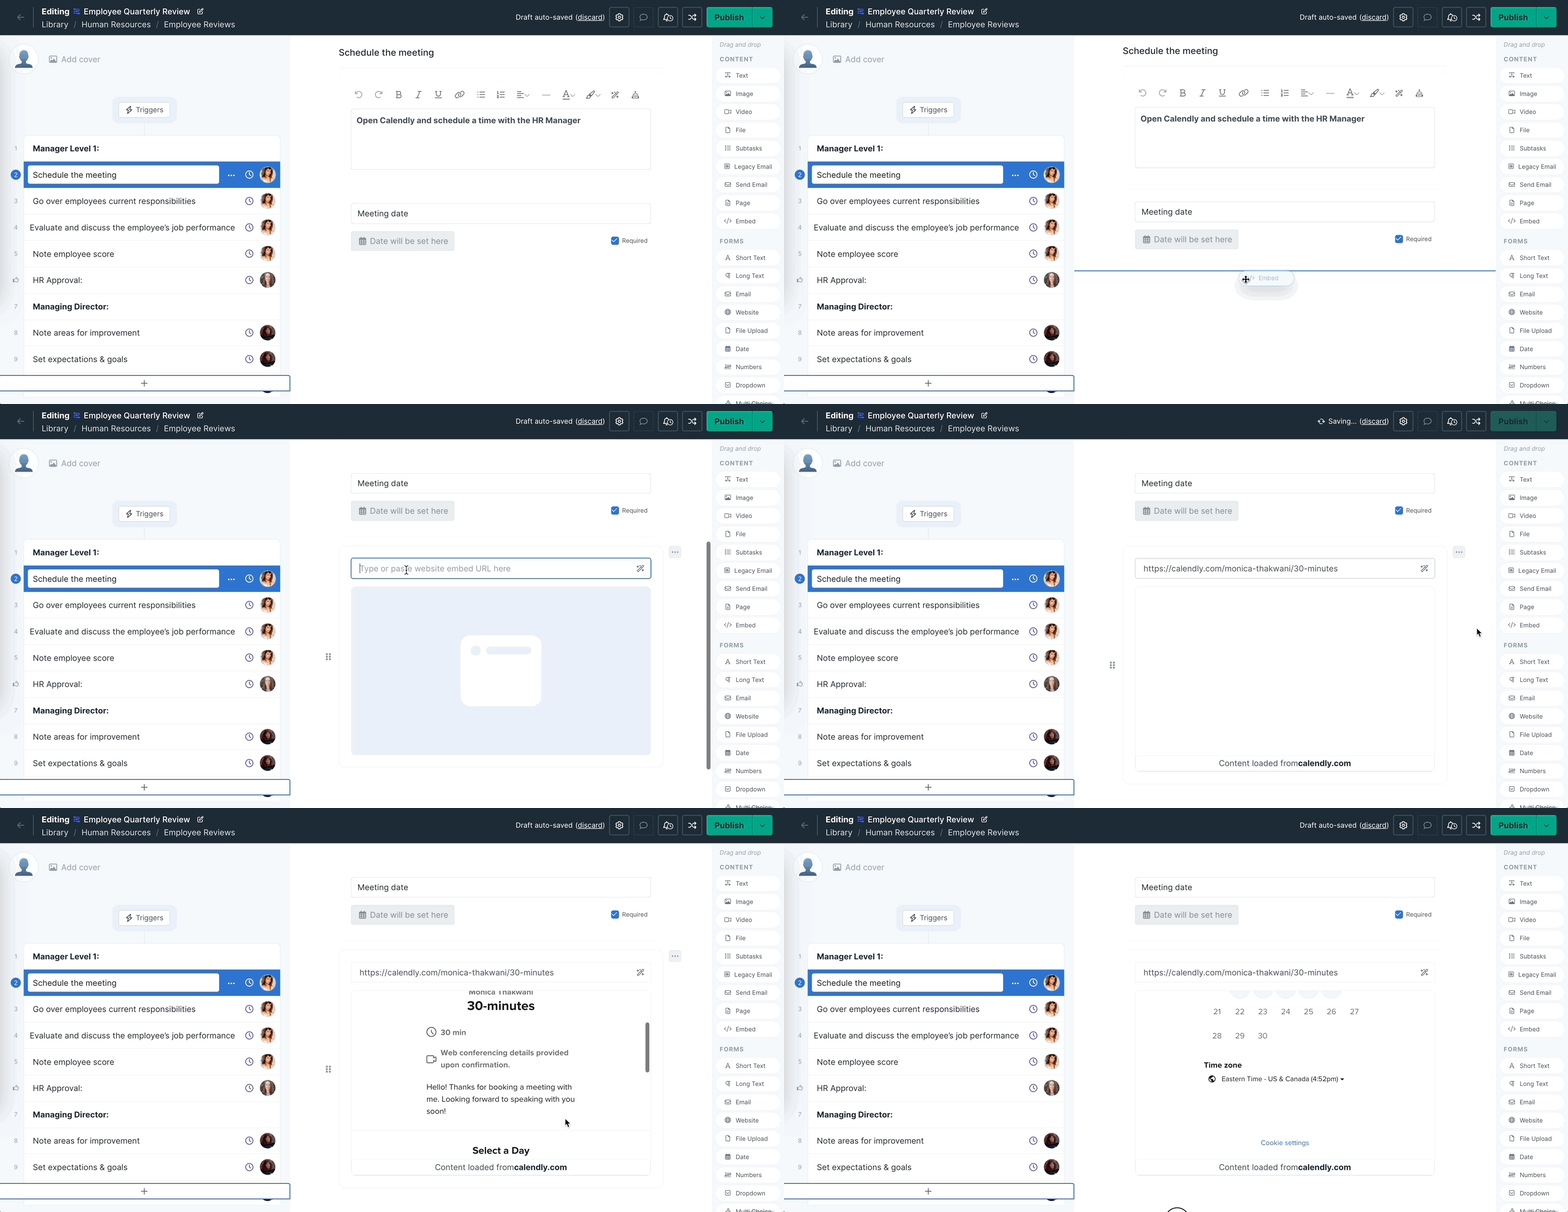
Inside the workflow editor you will see the </> Embed widget in the content section on the right-hand side. Clicking it will place the widget at the bottom of your form fields or you can drag and drop it where you want it in the center of your screen.
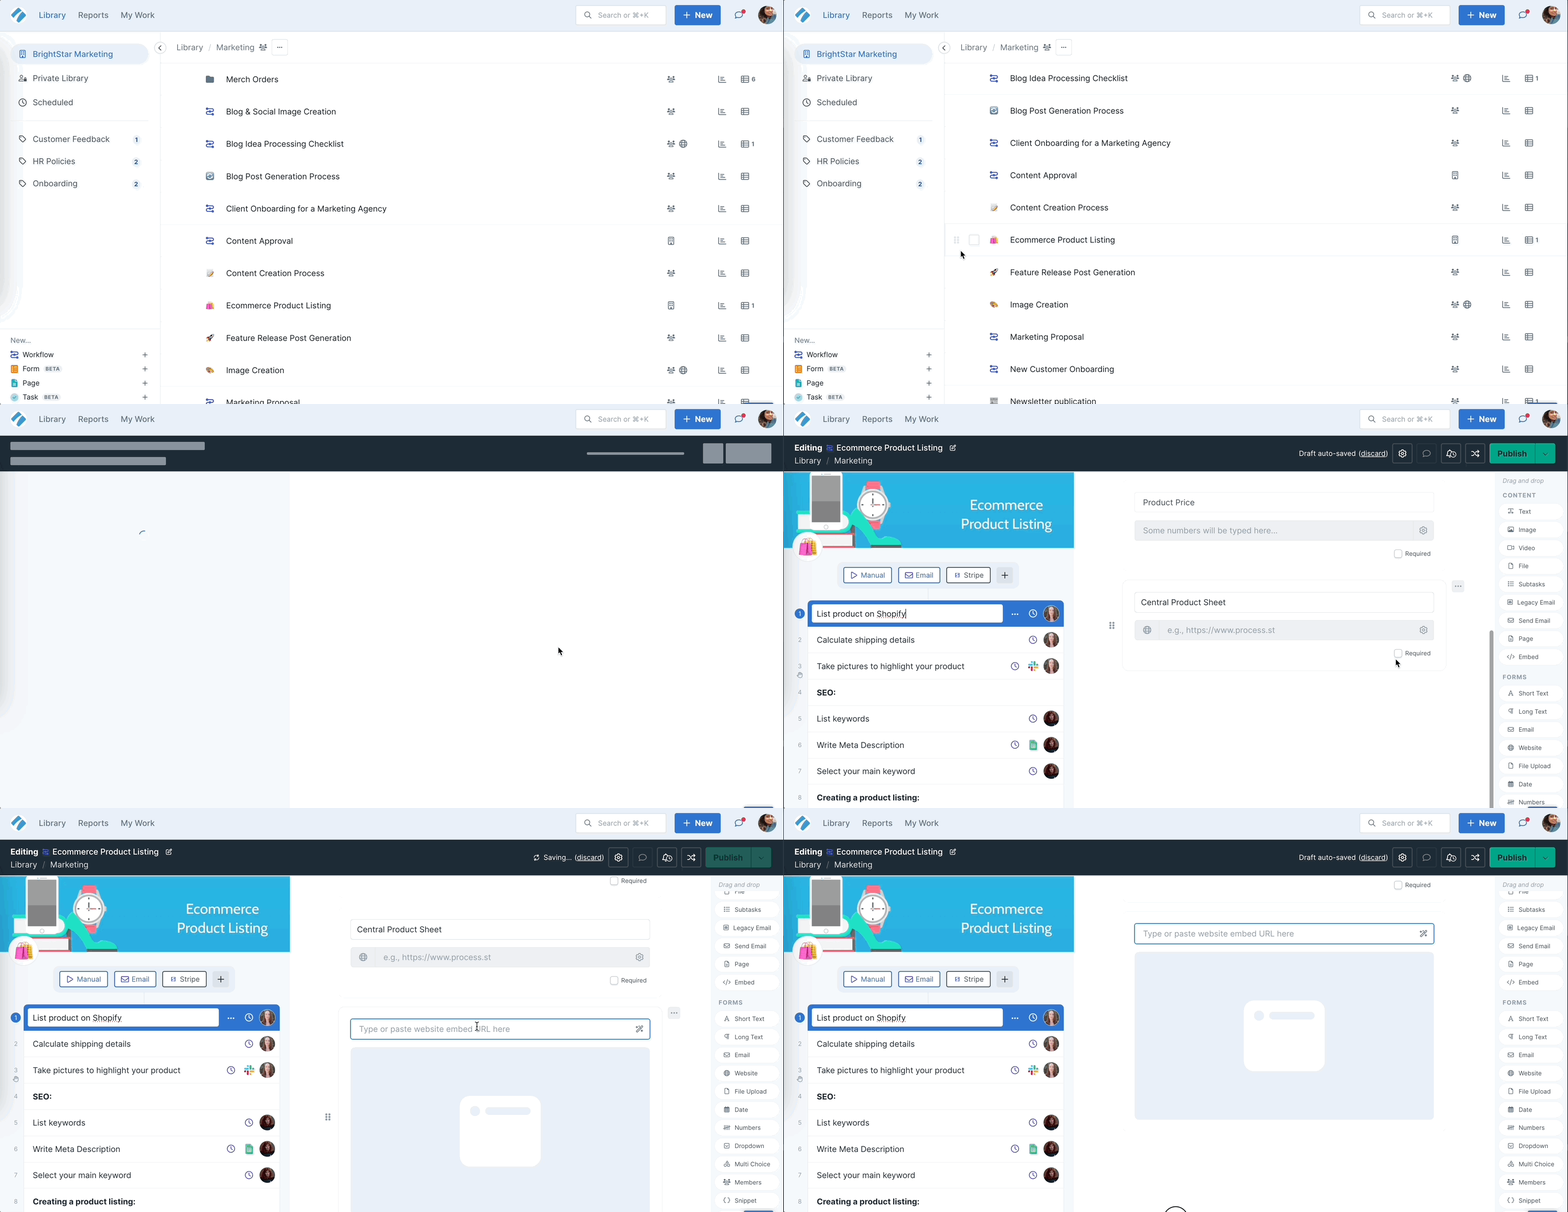
To embed content, you need either the embed code or the URL from the content you want to share.
This varies from product to product, so be sure to test out which works for your chosen content.
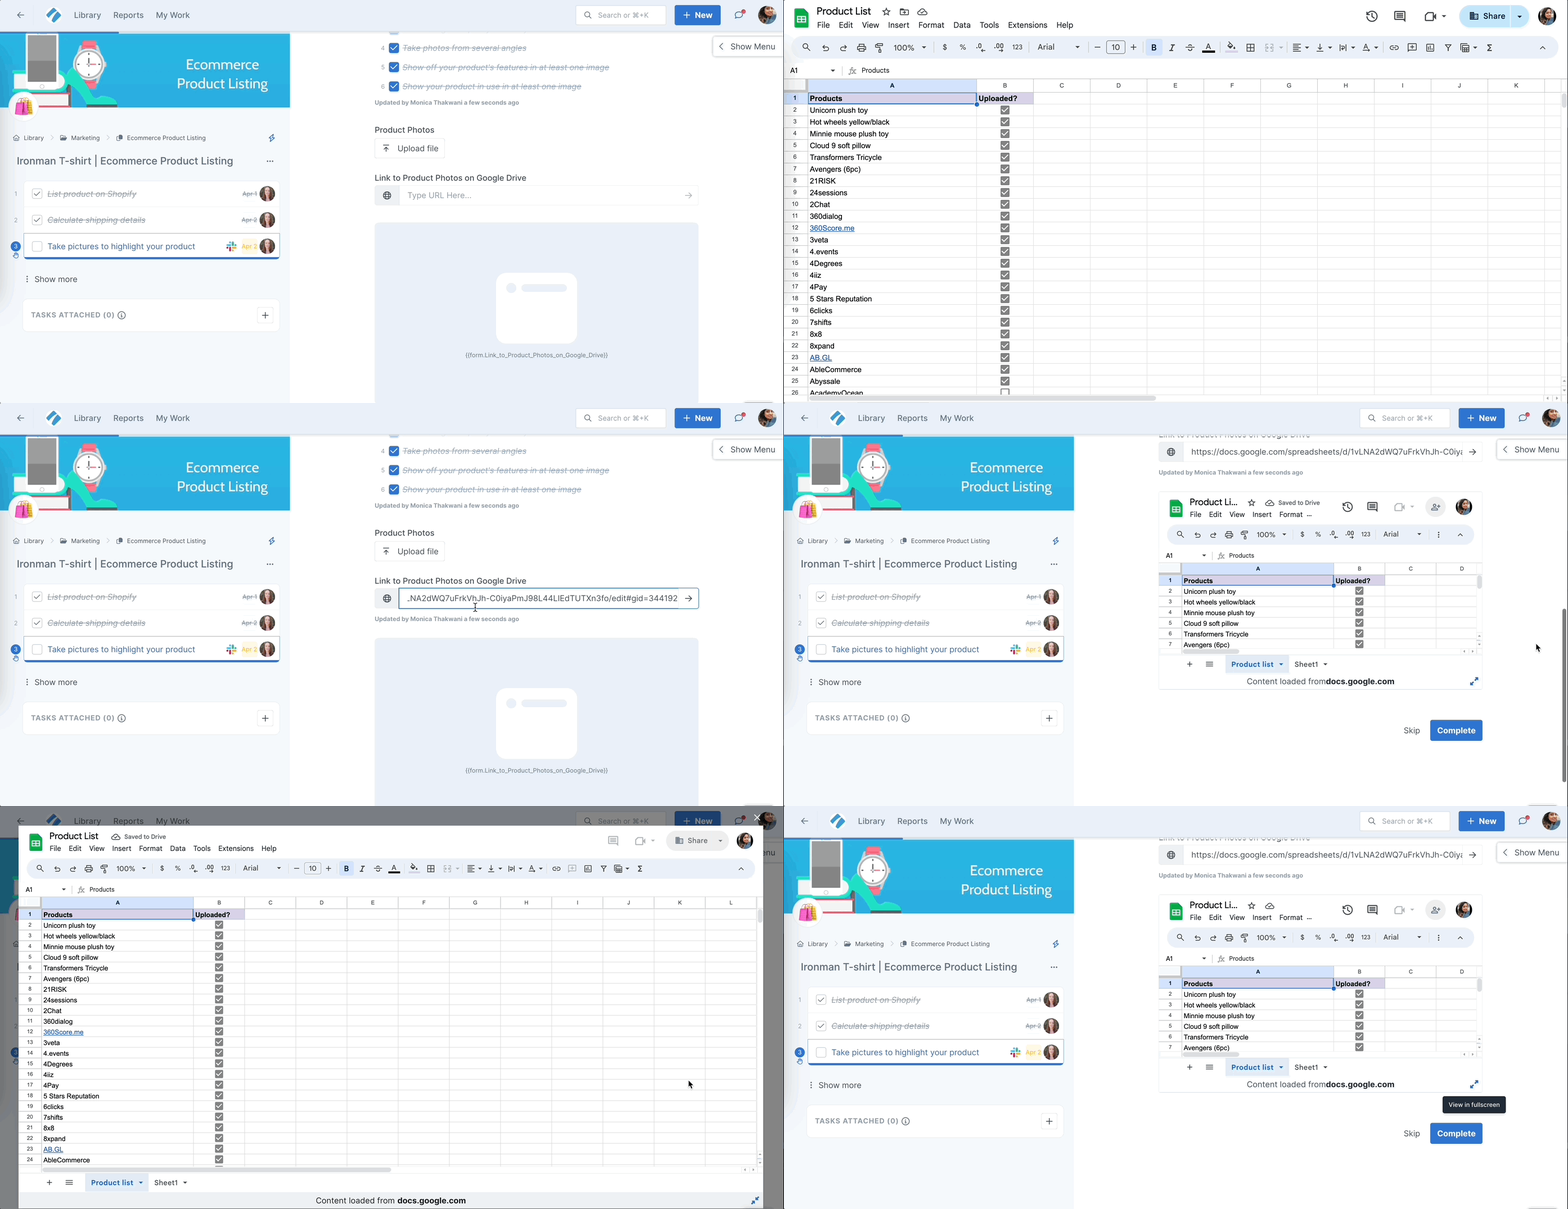
While viewing the embedded content in an active workflow run, if you want to view it in full screen, click the expand button in its bottom right corner, as shown below.
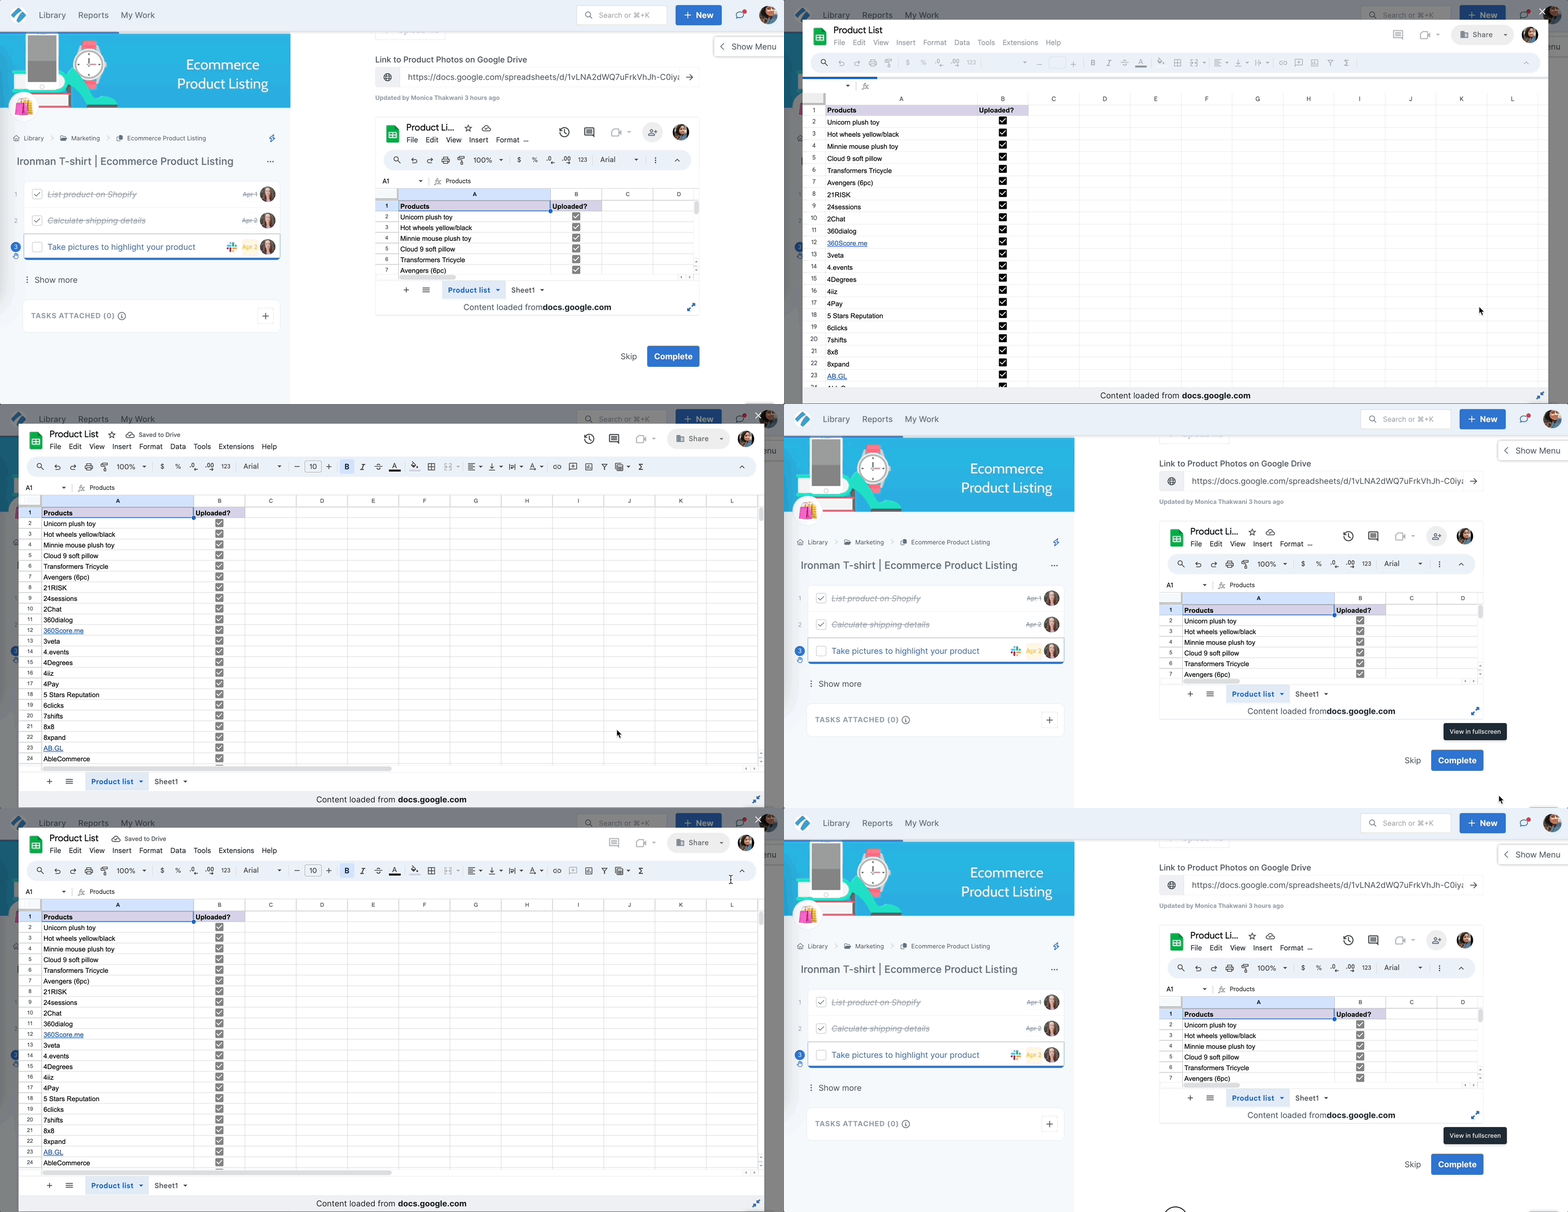
To exit the full-screen view, click the collapse button in its bottom right corner or the X button in its top right corner, as shown above.
We’ve added some notes on troubleshooting at the bottom of this article in case you hit a snag.
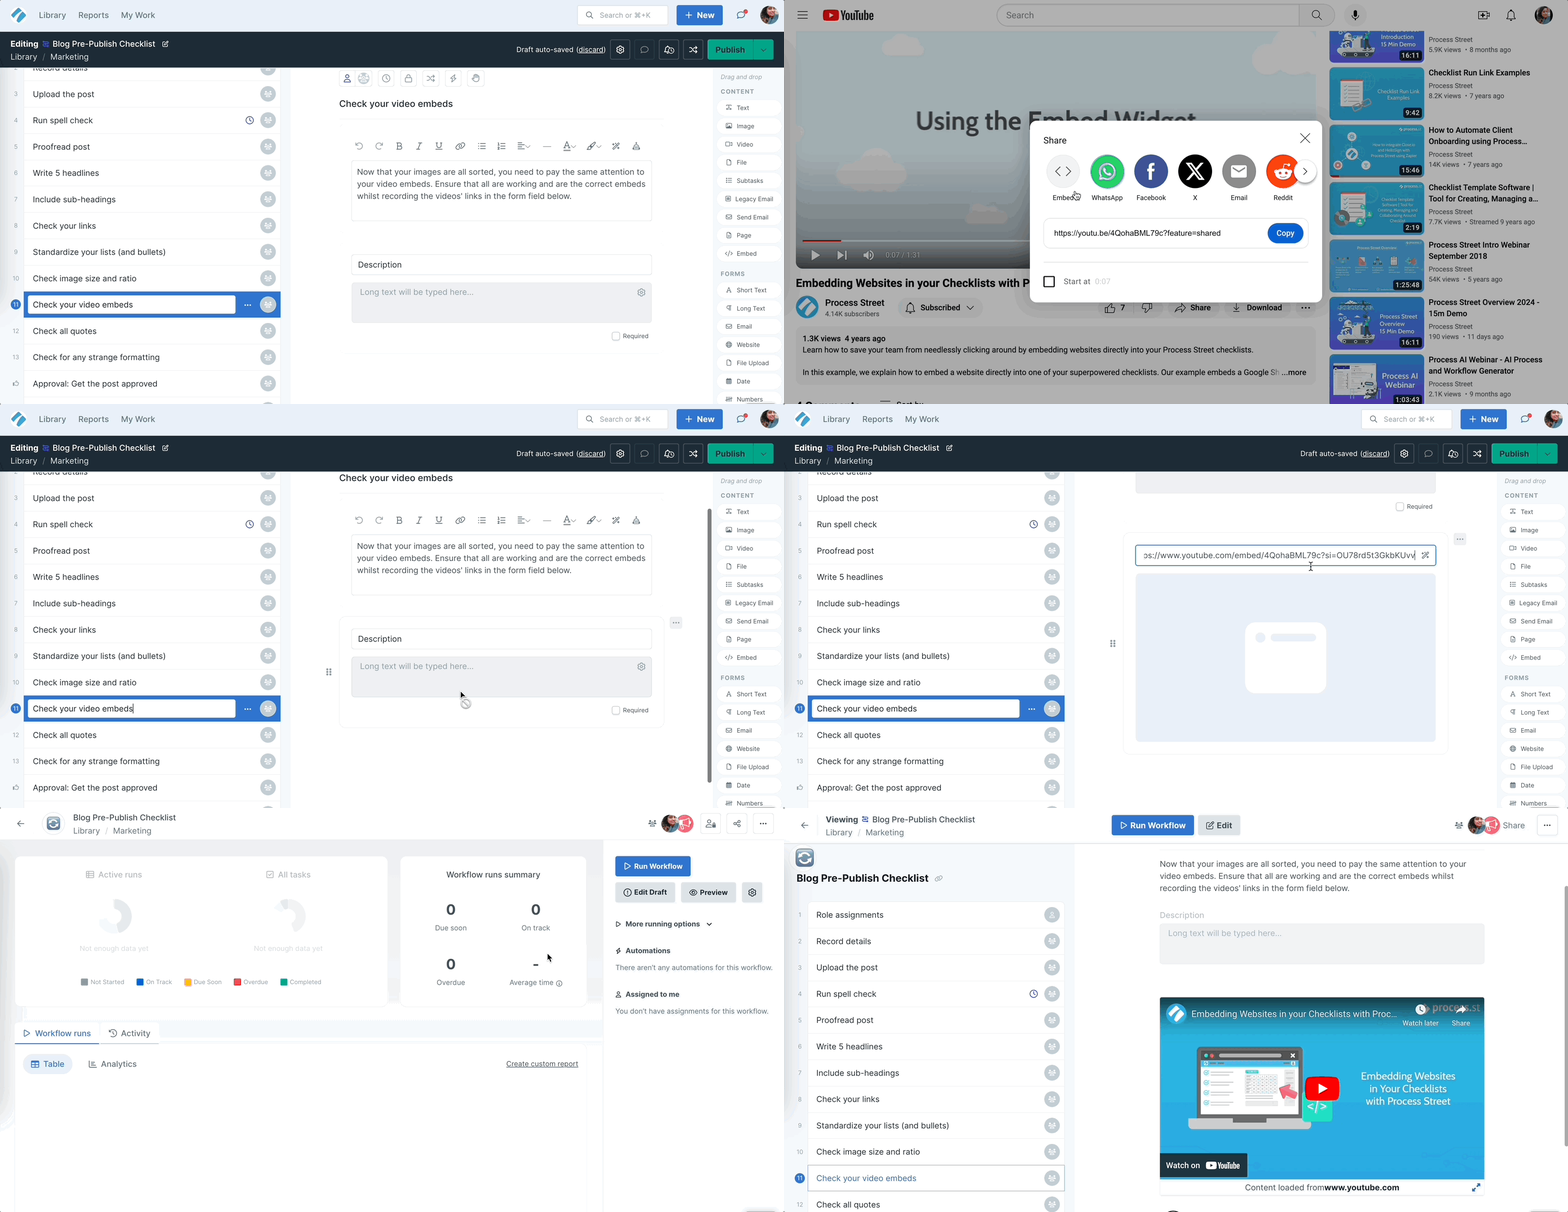
Once you’ve pasted your content’s link into the embed widget, you’ll see the content appear in your workflow.
Publish and run your workflow, to test the interactive content added to your workflow.
You can also use variables from the website form field to fill the embed widget automatically.
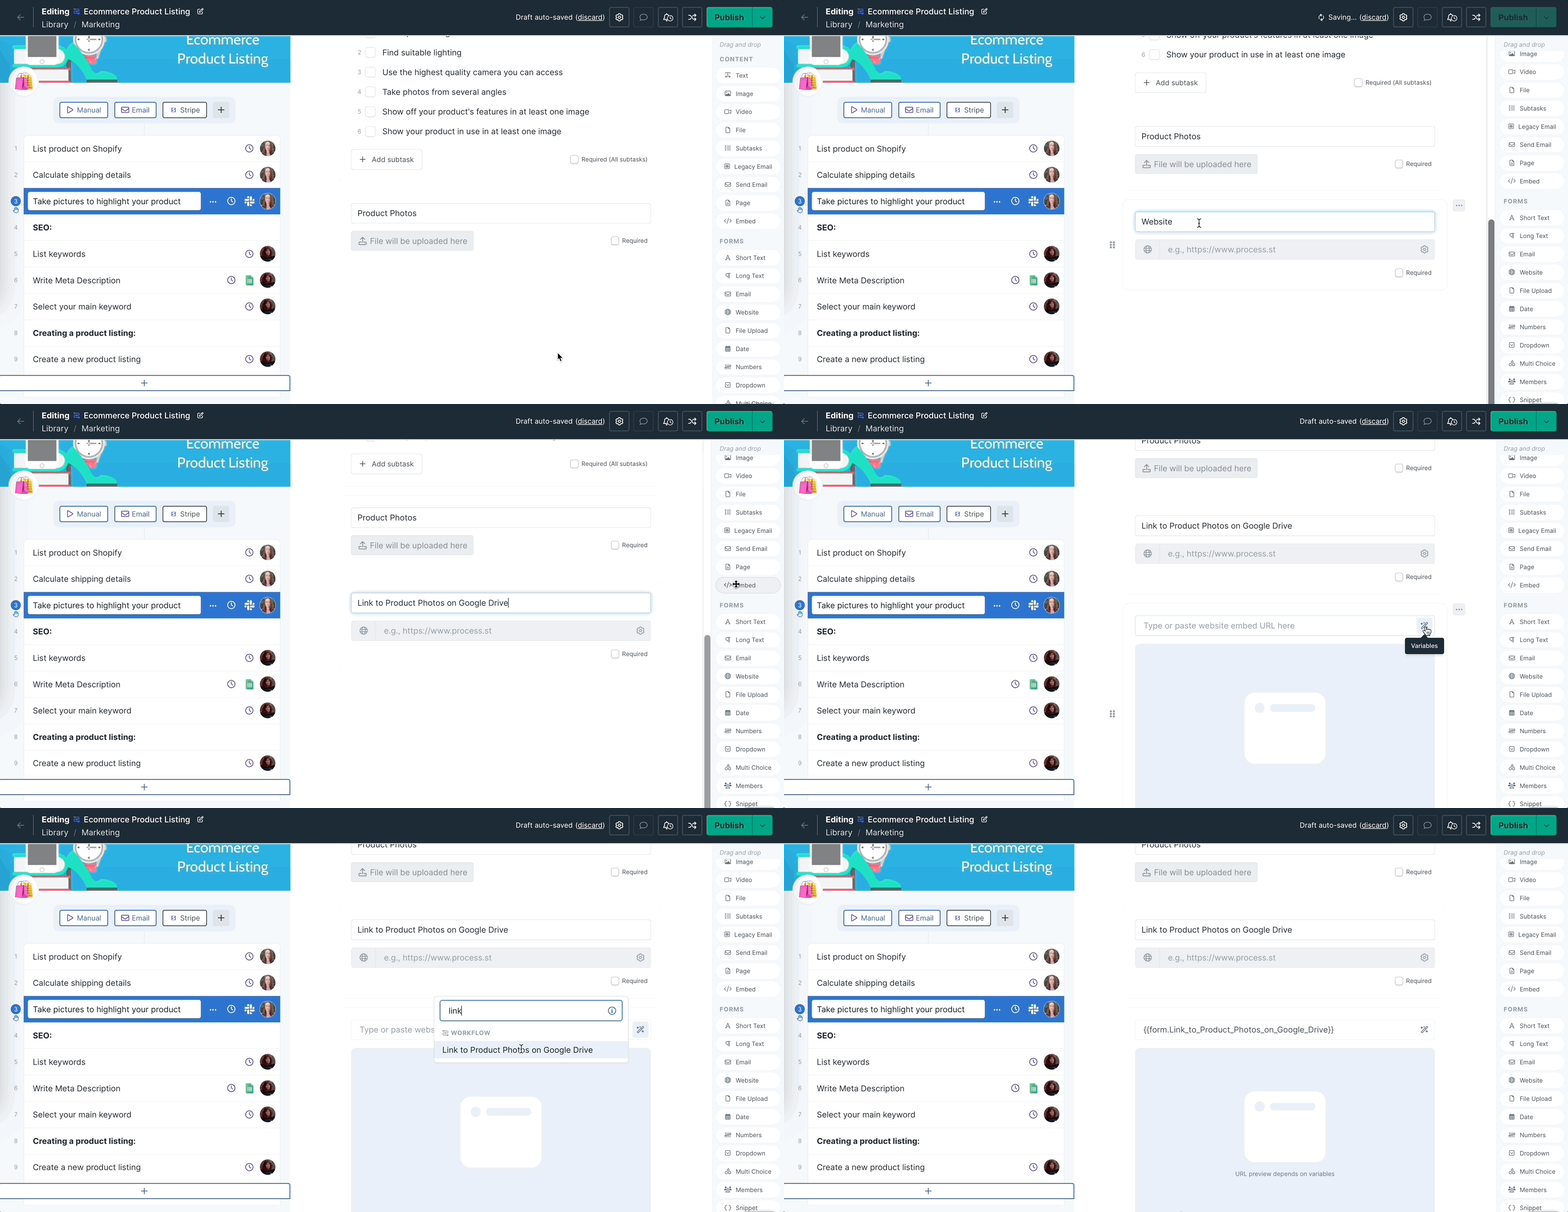
To set this up, you need to have at least one website field in your workflow.
Then add the embed widget to your workflow and click the magic wand next to it. In the variables dropdown, look for the website form field to push a URL into it from elsewhere in the workflow run.
Since this is a variable, the embedded website will only display once the website form field is populated in an active run.
Google Sheets Pro Tip:
You can adjust the URL parameters when embedding a Google Sheet. Just add the parameters before #gid=0 at the end of the URL:
rm=minimal
rm=full
rm=embedded
rm=demo
rm=(render mode)
ui=2 (select the interface version)
chrome=false (full screen mode)
gid=24 (Which sheet you want to display)
widget=false
single=true
range=A2:AA26 Output=html
widget=false
width=(width)
height=(height)
frameborder=(size of border)
q=(Whatever) Search Query
viewer?
start=
channel=
ibd=
client=
You can also use variables in the settings of an embed widget to be able to auto-fill that field from an input made elsewhere in your workflow run. Learn more about auto-filling fields with variables.
If you can’t see your content after pasting in the embed code or the URL, there are a couple of reasons why it isn’t working. One is that you need to find out if the URL works or if you need to use the full embed code. With some apps and sites, finding this out is a case of trial and error.
In other cases, it might help to shorten the URL using TinyURL or similar apps before you embed them.
Another reason could be that whilst most websites and content creators allow you to embed their content elsewhere, some don’t. If you keep seeing an error message when trying to add your URL, it could be that it’s been blocked from sharing by the creator or the application itself.
If you need any help with this topic, you can reach out to our support team.
Learn more about how the other widgets work: